Dig Collect Route Pattern Tiers
Rank Dig Collect dig shapes from clean exit corridors down to chaotic full-map scrapes.
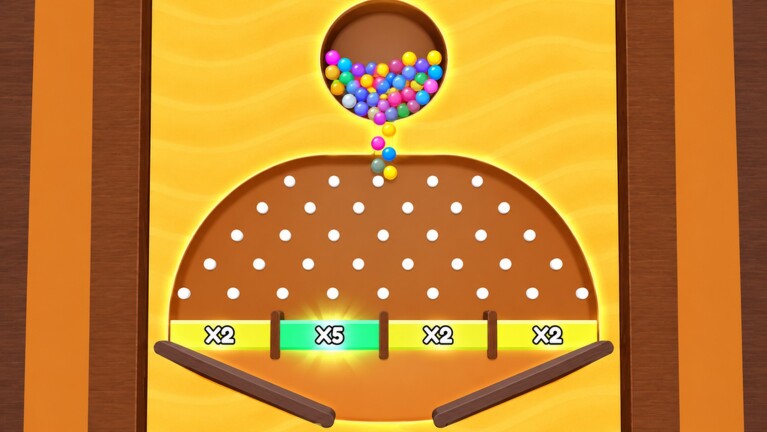
This page ranks Dig Collect route patterns—the sand shapes you carve—on an S-to-D scale. Dig & Collect by Collect Ball Game is a single-player Roblox sand-path puzzle: dig tunnels, guide colorful balls, and avoid traps. Level Difficulty Tiers ranks obstacle archetypes (splits, spikes, timed exits). Here we rank the routes themselves: clean exit corridors, holding shelves, shared channels, vertical drops, and full-map scrapes. Pair both lists with path digging, save all balls, and hard levels when a stage fights back.
How to read route tiers
- S-tier — Clean exit corridors: highest consistency when built early; finish geometry is solved before chaos starts
- A-tier — Holding shelves: temporary flats that park balls so you sequence releases
- B-tier — Shared channels: one tunnel serving multiple balls; efficient but collision-prone
- C-tier — Vertical drops: fast, simple, easy to overshoot into traps
- D-tier — Full-map scrapes: panic caverns with no planned centerline
Tiers describe route quality under pressure, not a claim that every live stage labels its tunnels. After a thirty-second survey, ask which route type you are about to dig—and whether that choice matches the hazard pattern on the difficulty page.
S-tier — Clean exit corridors
What it looks like: A finished, slightly-wider-than-ball lane into the goal, walls left thick beside any nearby spike or pit, slope continuous so balls do not stutter on micro-flats.
Why it is S: Working backward from the finish is the strongest habit in Dig Collect. When the last moment of every attempt is already solved, mid-map mistakes become recoverable instead of run-ending.
How to dig it:
- Orbit the finish before touching spawn sand
- Carve the exit corridor first—width, slope, and hazard margin
- Only then connect upward toward ball spawns
- Test with a single controlled release before opening multi-ball feeders
When to insist on S-tier exits: Spike-guarded finishes, narrow goal shelves, timed gates on the last beat, and any hard levels layout where the death happens at the door, not at the spawn.
Common failure: Digging a beautiful spawn drop, then improvising a jagged exit under time pressure. The corridor becomes a bounce lottery.
A-tier — Holding shelves
What it looks like: Intentional flat pads where a ball stops on purpose while you solve another lane or wait for a trap cycle.
Why it is A: Shelves turn simultaneous chaos into ordered releases. They are the backbone of save all balls play and the containment layer taught on the Tools Hub.
How to dig it:
- Place the shelf under the higher-risk ball first when paths diverge
- Keep shelf thickness honest—probe before parking two balls on thin sand
- Plan the release notch: one downhill tooth, not a random side scrape
- Release in reverse order of desired arrival when merges are tight
When shelves outrank speed: Multi-ball splits, collection-order puzzles, and timed exits that need a waiting pocket. If you cannot name which ball is parked and why, you are not using A-tier routes—you are leaving accidental flats.
B-tier — Shared channels
What it looks like: One corridor that two or more balls will use, often after staggered merges from feeder slopes.
Why it is B: Shared sand is efficient and elegant when timing works. It becomes a jam factory when both balls arrive together on a flat collision shelf or bounce off each other into a trap.
How to dig it:
- Decide a centerline and keep width consistent
- Stagger entry with shelves or different slope lengths so merges are sequential
- Avoid mega-cavities that erase wall thickness near hazards
- Prefer independent micro-channels until the safe merge point—then share
Upgrade path: If a shared channel keeps failing, split into two A-tier shelves plus a short S-tier exit instead of widening the cave. More sand removed is not more control.
C-tier — Vertical drops
What it looks like: Near-vertical shafts under spawns or mid-map plugs that dump balls downward fast.
Why it is C: Drops are easy to dig and feel decisive, but speed amplifies angle error. Balls bounce, overshoot finish shelves, or clip spike silhouettes that a gentle slope would have cleared.
How to dig it safely:
- Use a short drop only when you need to clear a gap quickly
- Add a catch pocket or braking shelf before the hazard line
- Never open a deep shaft directly above a trap “to see what happens”
- Convert panic shafts into stepped slopes when retries show overshoot
Practice tip: On C-tier teaching layouts from the level difficulty list, deliberately replace one vertical habit with a shallow slope so your muscle memory stays S/A oriented.
D-tier — Full-map scrapes
What it looks like: The entire sand body becomes one irregular cavern. No planned centerline, no parking logic, walls paper-thin beside every spike.
Why it is D: Occasional lucky clears teach the wrong lesson. Full scrapes destroy containment, make resets uninformative, and collapse the moment ball count or trap density rises.
How to escape D-tier habits:
- Instant reset when two balls are already unrecoverable mid-dig
- One-variable retries—change only the exit, or only one shelf, each attempt
- Name the route tier you intended before the first click
- Warm up with intentional narrow channels even when a bowl would “work”
If your notes say “I just dug everything,” you practiced D-tier. Move back to path digging grammar: slope to move, flat to wait, thick walls to survive.
Matching route tiers to difficulty patterns
| Hazard pattern (difficulty page) | Prefer route tier |
|---|---|
| Timed trap on narrow exit | S exit + A holding pocket |
| Multi-ball split under spikes | A shelves, then short B merge |
| Spike corridor | S/A with thick walls; avoid C drops |
| Narrow slope runaway | Stepped A shelves over one long C drop |
| Open teaching bowl | Still practice S corridors—do not grind D scrapes |
Hybrids score by the hardest mandatory route. A stage with a trivial first dig and a brutal final corridor is still an S-route exam if that corridor is required for an all-ball clear.
Practice syllabus (route focus)
| Session | Route goal | Link |
|---|---|---|
| 1 | Build exit first on three easy stages | Path digging |
| 2 | Park-and-release one ball on purpose | Save all balls |
| 3 | Shared channel with staggered merge | Level difficulty |
| 4 | Replace one vertical shaft with steps | Hard levels |
| 5 | Ban full-map scrapes; log route tags | Tools checklist |
Quick self-check after every fail
- Did I own an S-tier exit before releasing balls?
- Was any flat an A-tier hold—or an accident?
- Did a B-tier channel jam because merges were simultaneous?
- Did a C-tier drop create the bounce?
- Did I scrape the whole map (D) instead of changing one variable?
Answer in one sentence, then dig again. Route tiers turn vague tilt into a training syllabus—the same philosophy as the Tier List Hub overview.
Related pages
- Tier List Hub — strategy and pattern map
- Level Difficulty Tiers — obstacle S/A/B/C ranks
- Path digging — slopes, flats, width control
- Save all balls — multi-ball sequencing
- Hard levels — pressure tactics
Master route shapes on purpose. Dig Collect stops feeling like random sand clicks when every attempt begins with a named corridor plan.
Frequently Asked Questions
Quick answers for Dig Collect players.
How are route pattern tiers different from level difficulty tiers?
Level difficulty ranks obstacle archetypes like splits and spike corridors. Route patterns rank the sand shapes you dig—exit corridors, shelves, shared channels, drops, and scrapes.
What is the best Dig Collect route pattern?
Clean exit corridors (S-tier) built before you release balls. Solving the finish first makes mid-map mistakes recoverable.
When should I use holding shelves?
Use A-tier shelves for multi-ball splits, order puzzles, and timed exits that need a waiting pocket before the safe release.
Why are vertical drops only C-tier?
They are easy to dig but add speed and bounce that amplify small angle errors into trap hits or overshoots.
How do I stop full-map scrape habits?
Reset doomed digs early, change one variable per retry, and name your intended route tier before the first click. Review path-digging basics if scrapes keep winning by luck.